



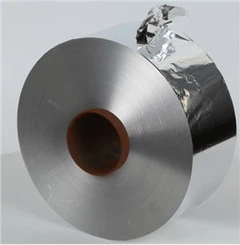


Attaching a 6-foot aluminum sheet to wood can be a practical and rewarding project, whether you're working on a DIY home improvement task, a construction project, or an artistic endeavor. As a supplier of 6-foot aluminum sheets, I've seen firsthand the versatility and durability of these materials. In this blog post, I'll share some insights and step-by-step instructions on how to attach a 6-foot aluminum sheet to wood effectively.
Understanding the Materials
Before you begin the attachment process, it's essential to understand the properties of both the aluminum sheet and the wood. Aluminum is a lightweight, corrosion-resistant metal that offers excellent strength and durability. It comes in various alloys, each with its own unique characteristics. For example, 3105 Aluminum Sheet for architectural is commonly used in architectural applications due to its good formability and corrosion resistance. On the other hand, Aluminum Plate is thicker and more rigid, making it suitable for structural applications.
Wood, on the other hand, is a natural material that provides warmth and aesthetic appeal. It comes in different types, such as softwood and hardwood, each with its own density and strength. When choosing wood for your project, consider the intended use and the load-bearing requirements. For example, if you're attaching the aluminum sheet to a structure that will support heavy loads, you may want to choose a hardwood like oak or maple.
Tools and Materials
To attach a 6-foot aluminum sheet to wood, you'll need the following tools and materials:


- Measuring tape: To measure the dimensions of the aluminum sheet and the wood.
- Pencil: To mark the cutting and drilling points on the aluminum sheet and the wood.
- Circular saw or tin snips: To cut the aluminum sheet to the desired size.
- Drill and drill bits: To drill holes in the aluminum sheet and the wood for the fasteners.
- Screwdriver or impact driver: To install the fasteners.
- Fasteners: Depending on the application, you may choose screws, rivets, or adhesive.
- Sandpaper: To smooth the edges of the aluminum sheet and the wood.
- Safety equipment: Such as safety glasses, gloves, and ear protection.
Step-by-Step Instructions
- Prepare the Materials:
- Measure the dimensions of the aluminum sheet and the wood using a measuring tape. Mark the cutting points on the aluminum sheet using a pencil.
- Use a circular saw or tin snips to cut the aluminum sheet to the desired size. Be sure to wear safety glasses and gloves when cutting the aluminum sheet.
- Sand the edges of the aluminum sheet and the wood using sandpaper to smooth any rough edges.
- Mark the Drilling Points:
- Place the aluminum sheet on top of the wood and align it with the edges. Mark the drilling points on the aluminum sheet and the wood using a pencil.
- The spacing between the drilling points will depend on the size and weight of the aluminum sheet. As a general rule, you should space the drilling points every 6 to 12 inches.
- Drill the Holes:
- Use a drill and the appropriate drill bit to drill holes in the aluminum sheet and the wood at the marked points. Be sure to use a drill bit that is slightly smaller than the diameter of the fasteners you'll be using.
- When drilling the holes in the aluminum sheet, use a slow speed and apply light pressure to prevent the drill bit from overheating and damaging the aluminum.
- Install the Fasteners:
- Depending on the application, you may choose to use screws, rivets, or adhesive to attach the aluminum sheet to the wood.
- Screws: Insert the screws through the holes in the aluminum sheet and into the wood. Use a screwdriver or impact driver to tighten the screws. Be careful not to over-tighten the screws, as this can damage the aluminum sheet or the wood.
- Rivets: Insert the rivets through the holes in the aluminum sheet and the wood. Use a rivet gun to secure the rivets in place. Rivets are a good option for applications where a strong, permanent bond is required.
- Adhesive: Apply a generous amount of adhesive to the surface of the wood. Place the aluminum sheet on top of the wood and press it firmly into place. Use clamps to hold the aluminum sheet in place until the adhesive dries. Adhesive is a good option for applications where a smooth, seamless appearance is desired.
- Finishing Touches:
- Once the fasteners are installed, check the alignment of the aluminum sheet and the wood. Make any necessary adjustments to ensure a tight fit.
- If desired, you can paint or coat the aluminum sheet to protect it from corrosion and enhance its appearance.
- Clean up any debris or dust from the work area.
Tips and Tricks
- Choose the Right Fasteners: The type of fasteners you choose will depend on the application and the load-bearing requirements. For light-duty applications, screws or adhesive may be sufficient. For heavy-duty applications, rivets or bolts may be required.
- Use a Backing Plate: When drilling holes in the aluminum sheet, use a backing plate to prevent the drill bit from damaging the wood. A backing plate can be made of wood, plastic, or metal.
- Pre-Drill the Holes: To prevent the aluminum sheet from cracking or splitting, pre-drill the holes in the aluminum sheet before installing the fasteners.
- Apply Sealant: To prevent water from seeping between the aluminum sheet and the wood, apply a sealant around the edges of the aluminum sheet.
- Test the Bond: Before using the structure, test the bond between the aluminum sheet and the wood by applying pressure to the aluminum sheet. If the bond is weak, you may need to reinforce it with additional fasteners or adhesive.
Conclusion
Attaching a 6-foot aluminum sheet to wood is a relatively simple process that can be completed with the right tools and materials. By following the steps outlined in this blog post, you can ensure a strong, durable bond between the aluminum sheet and the wood. Whether you're working on a DIY project or a professional construction job, our 3003 Aluminum Plate for storage tanks and other aluminum products are designed to meet your needs. If you have any questions or need further assistance, please don't hesitate to contact us. We're here to help you with your project and provide you with the best possible products and services.
References
- "Aluminum Sheet and Plate: Properties, Applications, and Fabrication." The Aluminum Association.
- "Woodworking Basics: How to Attach Metal to Wood." Family Handyman.
- "Fastening Aluminum to Wood: Best Practices and Techniques." DIY Network.