



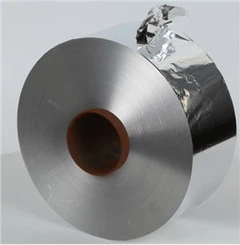


Hey there! As a supplier of 1050 aluminum strip, I've seen firsthand how important it is to properly prepare the surface before painting. In this blog post, I'll share some tips and tricks on how to get your 1050 aluminum strip ready for a fresh coat of paint.
Why Surface Preparation Matters
Before we dive into the preparation process, let's talk about why it's so crucial. When you paint directly on an unprepared aluminum surface, the paint may not adhere properly. This can lead to issues like peeling, chipping, and a less durable finish. Proper surface preparation creates a clean, smooth, and chemically receptive surface for the paint to bond to, ensuring a long - lasting and professional - looking result.


Step 1: Cleaning the Surface
The first step in preparing the 1050 aluminum strip for painting is to clean it thoroughly. Aluminum can accumulate dirt, grease, oil, and other contaminants during storage, handling, or manufacturing processes. These contaminants can prevent the paint from adhering properly.
- Degreasing: Use a commercial degreaser or a mild detergent solution. Apply the degreaser to the surface of the aluminum strip using a soft cloth or a sponge. Rub the surface gently in a circular motion to remove any grease or oil. Rinse the strip thoroughly with clean water to remove all traces of the degreaser.
- Removing Dirt and Dust: You can use a soft brush or a compressed air gun to remove any loose dirt and dust from the surface. Make sure to get into all the nooks and crannies, especially if the strip has any intricate shapes or cutouts.
Step 2: Abrading the Surface
Abrading the surface of the 1050 aluminum strip helps to create a rough texture, which improves the paint's adhesion. There are several ways to abrade the surface:
- Sandpaper: Use fine - grit sandpaper (around 220 - 320 grit) to sand the surface of the aluminum strip. Sand in a consistent direction, applying even pressure. This will create a uniform rough surface. Be careful not to sand too aggressively, as this can damage the aluminum.
- Wire Brush: A wire brush can also be used to abrade the surface. It's a good option for larger areas. However, make sure to use a brush with soft wires to avoid scratching the aluminum too deeply.
Step 3: Etching the Surface
Etching is a chemical process that further prepares the aluminum surface for painting. It helps to remove any oxidation and creates a micro - rough surface for better paint adhesion.
- Etching Solution: You can use a commercial aluminum etchant or make your own solution. A common homemade etchant is a mixture of phosphoric acid and water. Follow the instructions carefully when using an etching solution, as it can be corrosive.
- Application: Apply the etching solution to the surface of the aluminum strip using a brush or a sprayer. Let the solution sit on the surface for the recommended time (usually a few minutes), then rinse it off thoroughly with clean water.
Step 4: Rinsing and Drying
After etching, it's important to rinse the aluminum strip thoroughly to remove all traces of the etching solution. Use clean water and make sure to rinse all sides of the strip.
- Drying: Once rinsed, dry the aluminum strip completely. You can use a clean, dry cloth to wipe off the excess water, or let it air - dry. Make sure there is no moisture left on the surface before painting, as it can cause problems with the paint adhesion.
Step 5: Priming the Surface
Priming is an essential step in the painting process. A primer creates a barrier between the aluminum surface and the topcoat, improving adhesion and corrosion resistance.
- Selecting the Right Primer: Choose a primer that is specifically designed for aluminum surfaces. There are different types of primers available, such as epoxy primers and acrylic primers. Consider the environment where the painted aluminum strip will be used when selecting the primer.
- Applying the Primer: Apply the primer evenly to the surface of the aluminum strip using a brush, roller, or spray gun. Follow the manufacturer's instructions for the application method and drying time. Usually, you'll need to wait for the primer to dry completely before applying the topcoat.
Applications of 1050 Aluminum Strip
1050 aluminum strip has a wide range of applications. For example, it's commonly used in the food industry, especially for Aluminum Strips For Cookie Cutters. Its high purity and good formability make it an ideal choice for creating cookie cutters.
Another application is in the cooking industry. 1050 HO Aluminium Circles are often made from 1050 aluminum strip. These circles are used for making cookware due to their excellent heat conductivity.
If you're looking for a slightly different alloy, you might also be interested in 1060 Aluminum Strip. It has similar properties to 1050 but with a slightly higher silicon content, which can offer some additional benefits in certain applications.
Conclusion
Preparing the surface of 1050 aluminum strip before painting is a multi - step process, but it's well worth the effort. By following these steps, you can ensure that your painted aluminum strip has a long - lasting and professional - looking finish.
If you're in the market for high - quality 1050 aluminum strip or have any questions about the surface preparation process, feel free to reach out. We're here to help you with all your aluminum strip needs and guide you through the painting process.
References
- Aluminum Association. Aluminum Design Manual.
- Paint manufacturers' product data sheets.